Print/Search pdf
- Introduction
- Setup
- Remote
- Synchronizing
- NAS Access
- Analyze and Repair
- Explore your Music
- Access
- Maximize iTunes Match
- Actions
- Help
- About SuperSync
|
|
SuperSync Quick Setup Guide
Syncing Between Two iTunes Libraries Over A Network
This guide walks you through the setup and syncing of two iTunes Libraries over a network using SuperSync.
For the purpose of this guide, we will be using the following scenario:
- Two computers (Computer #1 and Computer #2)
- Both computers are connected to the same network/LAN
- Both computers use iTunes to manage that computer's music, movies, etc.
- Both computers have different content in their libraries
- Both libraries will be 'Sync'ed' so both computers have the same content
- Both computers will use SuperSync's to 'Get', 'Put', and 'Sync' files between the two iTunes libraries
If you are using a different configuration, please read this guide since the concepts in presented here will also help you understand the basics of SuperSync. Other configurations, such as syncing with a network drive are discussed later in this manual.
Tip: Before attempting a complete synchronization, at least for the first time, you should synchronize only one or two files to make sure they're going where you expect them.
Note: All of the Quick Start guides below assume that you are using iTunes as your default local music library. Typically your Local Library is configured to us iTunes and you then connect to various "remote" libraries such as iPods,iPhones, disk drives, and other networked SuperSync libraries.
Computer #1 and Computer # 2 Setup
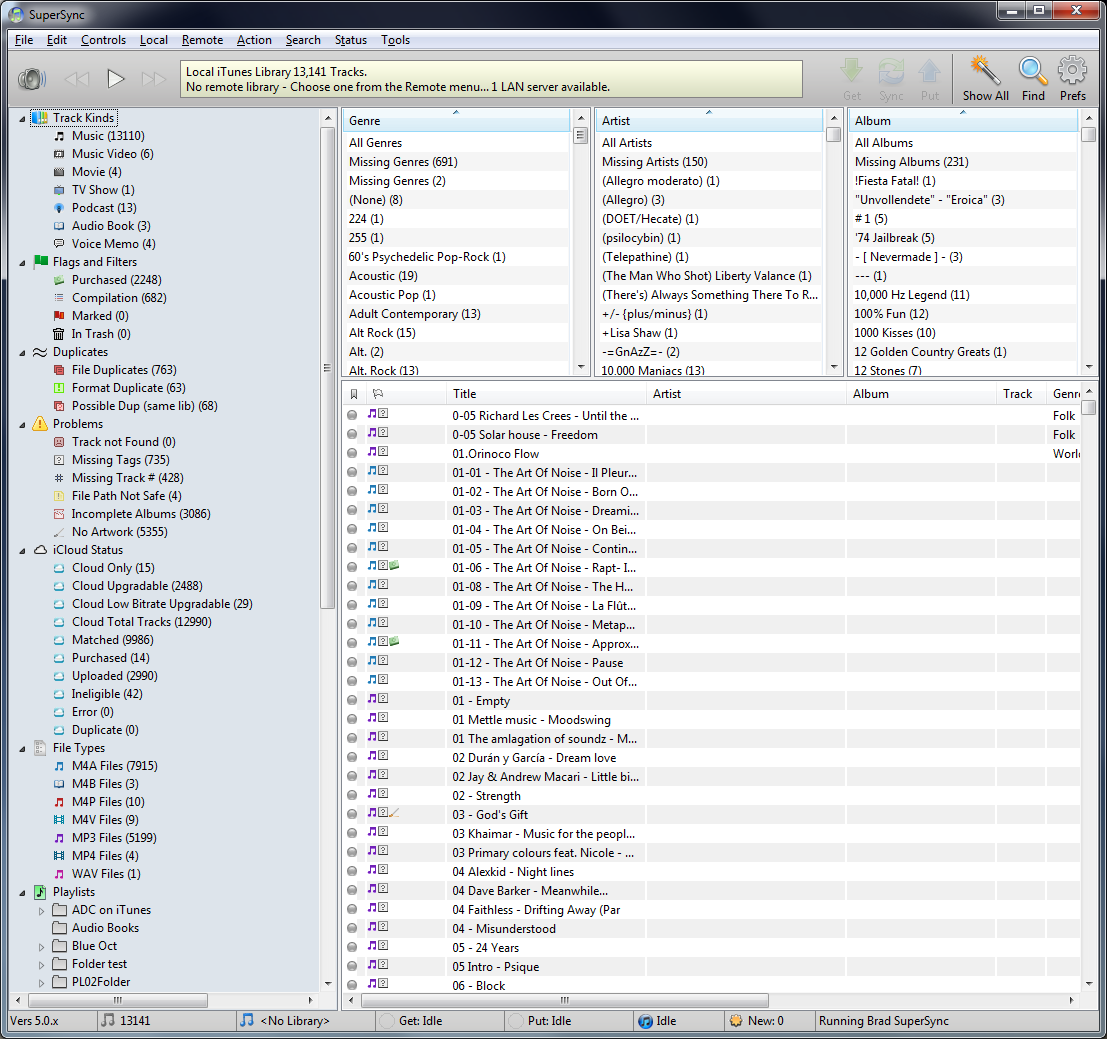
- Install and launch SuperSync on Computer #1. When the SuperSync starts, SuperSync will connect to your iTunes library and show it's content.
Note: The first time you launch SuperSync, SuperSync will ask you if you want to enable the SuperSync Server and setup a password for server access. If you see this screen, you can enter it now, or later in the next steps.
- Open SuperSync's Preferences (
 ,) via SuperSync's FILE menu (Mac) or EDIT menu (Windows). ,) via SuperSync's FILE menu (Mac) or EDIT menu (Windows). 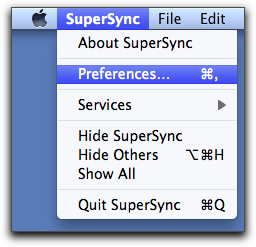 
- Next click Network Preferences tab. Enable/Check the 'Enable SuperSync Server' and the 'Accept Music Uploads From Other Networked SuperSync(s)' checkboxes. These checkboxes will allow your computer to be seen by other computers running SuperSync.
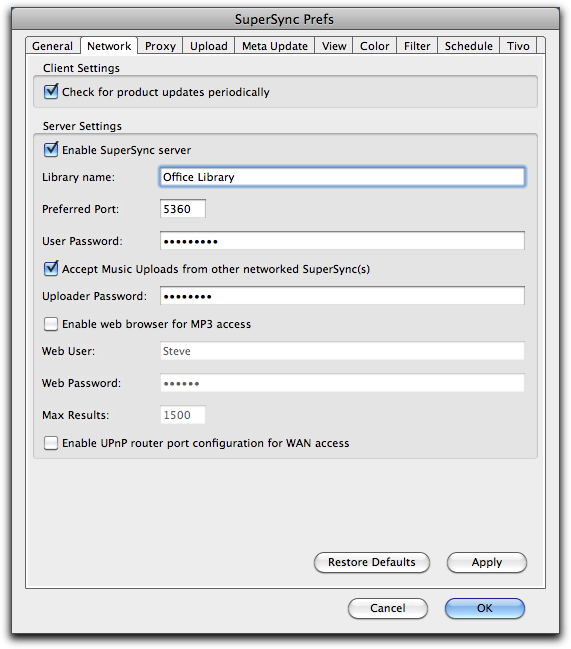
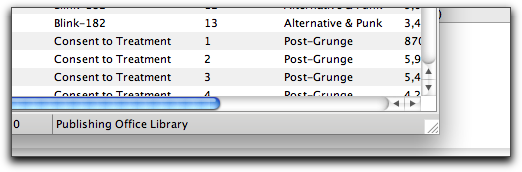
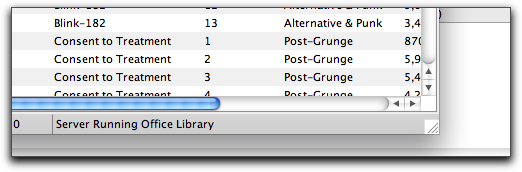
- Verify that the SuperSync Server is running by looking at SuperSync's Status Bar. In the lower right-hand corner of the SuperSync Window, the server status should change from "Publishing [yourServerName] to "Server Running [yourServerName]"
Note: If the SuperSync Server isn't running, confirm SuperSync's Preferences (Step 2). If you still have issues starting the SuperSync Server, see the Server Help and the Network Trouble Shooting Guide.
- Once you verify that the SuperSync Server is running, the configuration on this computer is complete. Leave SuperSync running since we will be connecting to it later in this quick start.
-
- Repeat Steps 1-5 on Computer #2 (and any other computers if you have more than a 2 client SuperSync license).
Connecting To A Computer Running SuperSync
- From Computer # 1, in SuperSync's Remote menu, select the 'Connect to LAN Server' command and then select your Computer # 2.
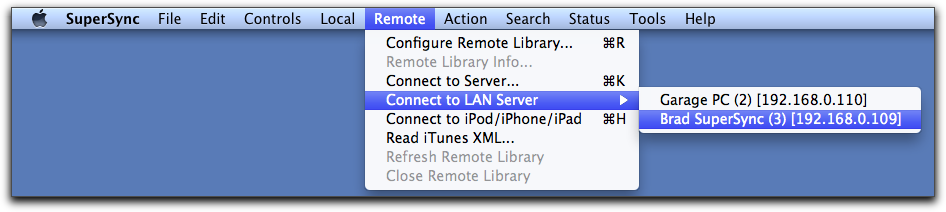
After selecting your Computer #2, SuperSync on Computer #1 will connect to Computer #2's library.
Note: You can initiate the connection from either computer since the SuperSync Server is running on both computers.
Tech Info: The Connect to LAN Server looks for other SuperSync computers via Bonjour. If you don't see your other computer, you can manually enter your other computer's IP address by using the 'Connect to Server' command in the Remote menu.
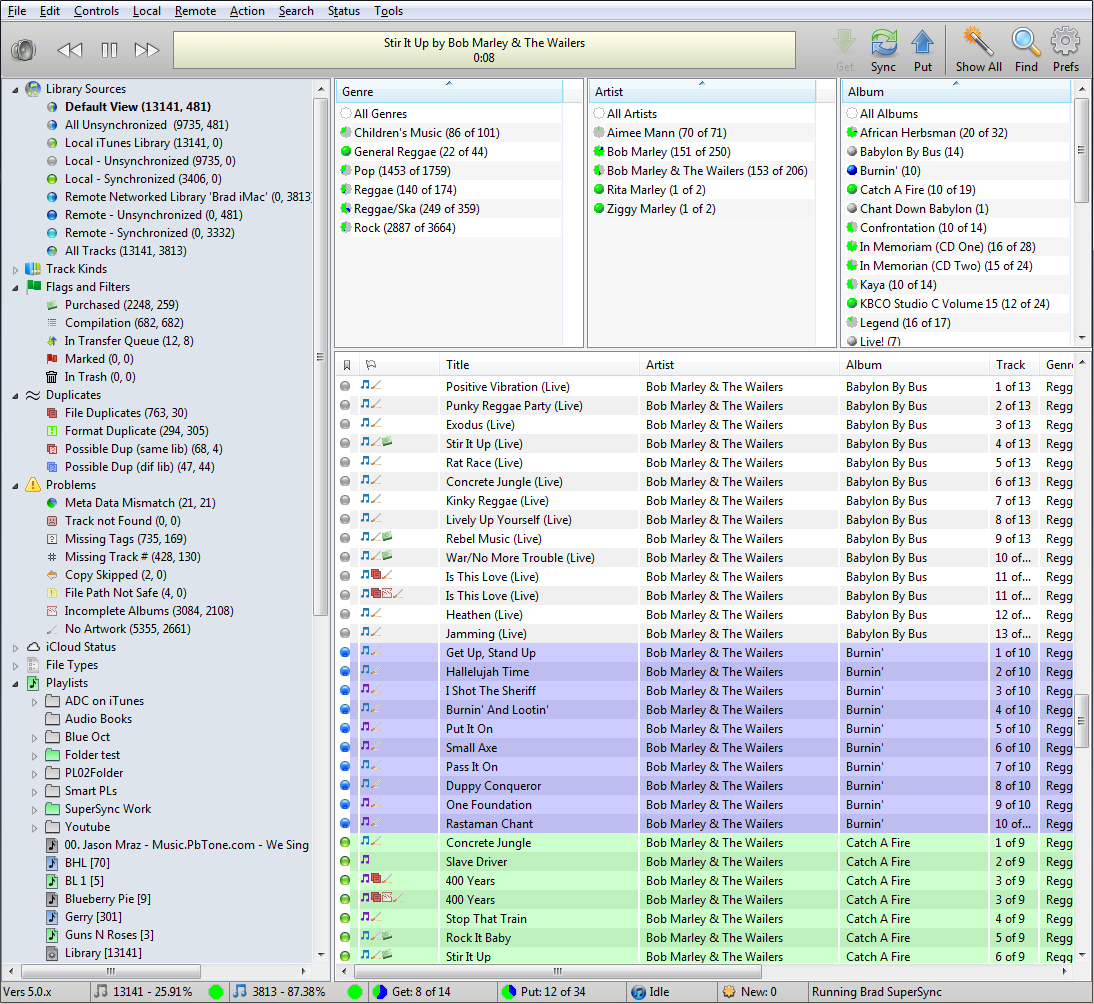
- Once SuperSync connects to the other library, SuperSync will connect to that computer and display both libraries (the Local and Remote libraries) in the SuperSync Window.
-
At this point, both libraries are connected. We will now use SuperSync to compare and sync content between the two libraries.
Quickly Determine Which Songs Need To Be Synced
Now that you are viewing Computer #1 and Computer #2's libraries, we will use SuperSync's Filter Tree to quickly determine which songs need to be synced from either the Local or Remote library's point of view. To do this, follow these steps:
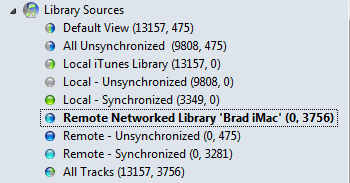
- Once SuperSync is connected to another library, you will see 'Library Sources' in SuperSync's 'Filter Tree' pane.
This shows the tracks that are in your remote library, where blue tracks are Remote Only, and Turquise tracks are in both the local library and remote library.
- By clicking on one of the Library sources, you can see tracks that are synchronized (in both libraries), unsynchronized (in just the local or remote library) or any combination.
- Select the 'Local Unsynchronized' view to see songs that are on your computer (aka the Local Library) but not in the Remote Library.
- Select the 'Remote Unsynchronized' view to see songs that are in the Remote Library but not on your computer (aka the Local Library)
- Select the 'Default View' view to see all the tracks in your library.
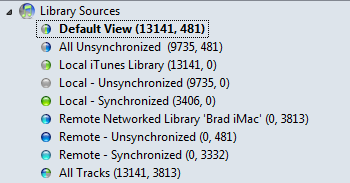
- Other views can show unsynchronized tracks, synchronized tracks, All local or remote tracks, etc.
- Filters are covered in detail in the Main Window section.
- Note: When viewing tracks, you will notice a a colored dot next to them. This dot identifies where the track exists and whether or not it has been synchronized in both libraries. The following is a list of the possible colors you may see:
 Gray dot: Gray dot:
located in Local Library. If you are viewing two libraries, the track is unsynchronized (i.e. not in the Remote Library)
 Blue dot: Blue dot:
located in Remote Library. The track is unsynchronized (i.e. not in the Local Library)
 Green dot: Green dot:
Synchronized track. Track is in both Local and Remote libraries.
 Turquoise dot: Turquoise dot:
Synchronized track. Track is in both Local and Remote libraries. Turquoise tracks are usually omitted so that you don't see two of every synchronized track.
- You have now selected the key views for determining which songs need to be synced. In the next section, we will be selecting tracks and syncing them between the two libraries.
Syncing Songs Between Two Libraries
Now that you are have viewed your identified your unsynchronized tracks, we will use SuperSync's Get, Put, and Sync commands to move tracks between the two connected libraries. Since this is your first time syncing songs, we will start by selecting individual tracks to transfer between computers. We will later sync multiple tracks between your computers. To do this, follow these steps:
- In SuperSync's Track List, find a unsynchronized track (either a Local track [ gray dot] or Remote track [ blue dot]).
-
- To sync an unsynchronzied song:
- Select one or more Gray tracks and click Sync or Put button copy them to the Remote SuperSync library
- Select one or more Blue tracks and click Sync or Get button copy them to your Local SuperSync library
- Once you use the Get, Put, or Sync actions, SuperSync will open the Transfer Status Window and show you the status of your transfer(s).
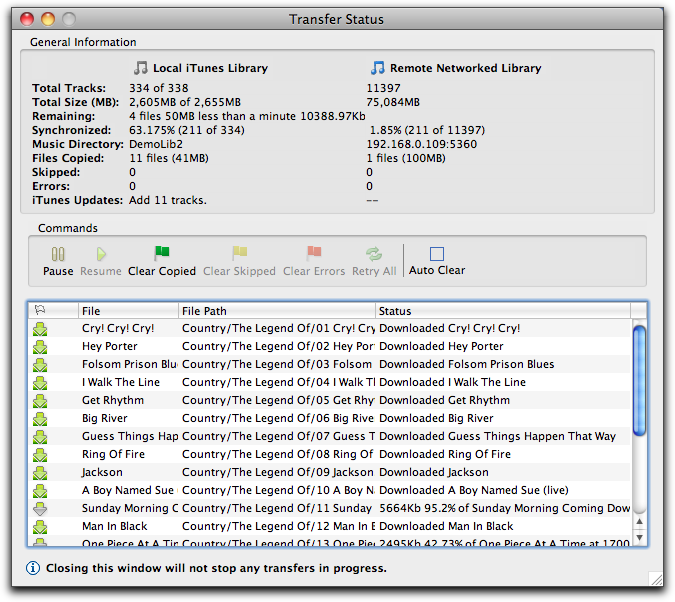
Note: The Transfer Status Window shows detailed information about your transferred files such as number of songs transferred, total size (in MB) of transfers, number of files skipped (due to duplication or errors), iTunes Updates (SuperSync telling iTunes to make updates to its database), etc.
- Once your tracks have been transferred, SuperSync will update its Track List and, if necessary, tell iTunes (on either your computer or the Remote computer) to update its database for the newly added songs.
You can confirm that your files were transferred successfully by opening iTunes on either computer. Please note that transferred files may not appear immediately since iTunes may take a few moments to complete its database updates. You can also use the ''Local Synchronized' and 'Remote Synchronized' views in SuperSync to see if your synced songs appear as 'synced' (with either a green dot or turquoise dot).
- If you wish to sync more individual tracks, repeat Steps 1 through 4. If you want to synchronize all the songs between both libraries, you can select an entire view and then select the Get, Put, or Sync actions.
-
- You have now learned how to transfer songs between two libraries using SuperSync.
Conclusion
At this point, you have connected two iTunes libraries on two different computers and synced tracks using SuperSync. This is the way SuperSync is most commonly used but there are many other ways of using SuperSync. You can use SuperSync to listen to your music, share/stream your music via web browser, copy songs from an iPod, iPhone, iPad, etc, sync and backup your data to an external drive, etc. The rest of this section quickly describes how you can sync your Local Library with other types of Remote libraries. It also describes different ways to access your libraries (e.g. via a web browser or via SuperSync across the Internet/WAN).
Additional Quick Setup Guides
Import tracks and playlists from an iPod or iPhone
- Under the Remote Menu, select "Connect to iPod or iPhone..."
- Connect an iPod by USB. When found, your tracks should be loaded.
- Tracks are color coded: Gray=Local Track, Blue=Remote Track, Green=Synchronized (in both)
- Select one or more Blue Tracks and click Synchronize to copy tracks from the mobile device to your local music directory
- Select any
 Blue playlists from the Playlist Tree to synchronize the playlists. Blue playlists from the Playlist Tree to synchronize the playlists.
- Close the Remote library when done from the Remote menu to disconnect the Apple mobile device.
Import a directory or hard drive into your music library
- Select Configure Remote Library from the Remote menu
- Select Read music/video files from mass storage (disk, network drive, etc.) and click Next
- Click Set... to set the hard drive or directory you'd like to import and click Next.
- Select one or more Blue tracks you'd like to import and click "Synchronize"
- Monitor the Transfer Status Window to see how many files remain to be copied
- After copying the files SuperSync will also add the files to your iTunes library
- When finished, close the Remote library.
Export tracks to a hard drive or directory
- Select Configure Remote Library from the Remote menu
- Select Read music/video files from mass storage (disk, network drive, etc.) and click Next
- Click Set... to set the hard drive or directory you'd like to export tracks to and click Next.
- Select the Gray tracks you'd like to export and click "Synchronize"
- Tracks that have been copied to the remote drive, the tracks will turn Green.
- When finished, close the Remote library.
Access a Remote computer/library over the Internet/WAN (Wide Area Network)
- Install SuperSync as with the previous computer(s)
- To access this SuperSync server from outside of your WAN, check the UPnP checkbox.
- Be sure to set your passwords. Opening the firewall for SuperSync traffic on your O/S and/or router may be needed.
- Determine the IP address and port of this computer by using "Check my IP..." under the Tools menu and test the connection!
- On another SuperSync computer, use the Connect to Server... from the Remote menu and enter the WAN IP address, followed by a colon and the port number.
- View the merged libraries - Tracks are color coded: Gray=Local Track, Blue=Remote Track, Green=Synchronized (in both)
- Select one or more Gray tracks and click Synchronize to copy them to the remote SuperSync library (remote server must allow uploads)
- Select one or more Blue tracks and click Synchronize to copy them from the remote library to your local library
Check your library for new or missing tracks
- SuperSync's rescan feature will find missing tracks (shown in iTunes with a !) or add tracks that are on disk but not in iTunes.
- From the File menu, select "Rescan Local Library..."
- Select all the check boxes and click Start Rescan
- Review any changes. Keep an eye on iTunes to dismiss any password dialogs that come up in iTunes
More SuperSync Activities
Remove duplicates is covered in its own help chapter. Read it carefully before attempting to delete duplicate tracks.
Setting up SuperSync for iTunes Match help SuperSync work with tracks that are on iCloud.
View your MP3's from a web browser
- Enable the SuperSync server and check the Web Access button in the network settings.
- From the Tools menu, select "Open Personal Music Browser" or enter the IP address of your computer into a web browser
- You should see a web page with your music available for browsing via the web.
- To access your music over the WAN, you'll need to enable port forwarding on port 5360 or enable the UPNP check.
- A special browser for iPhone/iPod touch users is also included that allows you to play individual tracks. Simply type the IP:port of your server into your iPhone's Safari Browser. (e.g. 12.34.56.78:5360)
SuperSync Quick Setup Wrap Up
We have now covered the most common way of setting up and using SuperSync. Our next section, The SuperSync Window, describes the SuperSync Window's features and use.
SuperSync -- iTunes libraries in perfect harmony. Copyright © SuperSync.
SuperSync is licensed for reproduction of non-copyrighted materials or materials the user is legally permitted to reproduce.
iPod and iTunes are registered trademarks of Apple, Inc., which is unaffiliated with SuperSync. Please do not steal music.
|